|
This article is a step-by-step tutorial on how to upload optimized photos to facebook using AZImage.
Lauch AZImage (by using the shortcut on your desktop or from the Start Menu / Programs / AZImage.
Add your photos to the conversion list. Open Windows Explorer (for example by pressing the windows key + E). Go to the folder where your images are. Select your images (select multiple images by keeping the Ctrl key pressed while clicking them). Drag your images with the mouse on the AZImage window.
Define the conversion format:
Press on "Select Format" tab. Now press on "Add..." on the toolbar. The add format window opens up. We show you how to configure each of the five tabs.
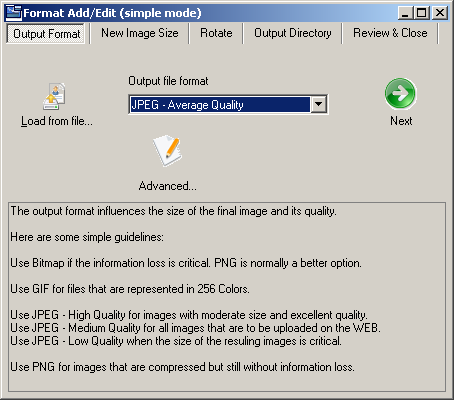
Output Format
Set the output format to JPEG - Average Quality (to get a small upload size). Alternatively you can use JPEG - High quality if the photo quality is the top priority, but for the small image size of maximum 604 pixels in width/height the quality differences are in most of the cases not relevant. You can also fine tune each of the JPEG parameter in the advanced dialog (press "Advanced..."). |
|
 |
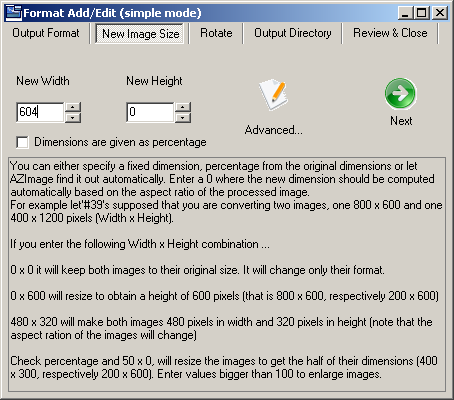
New Image Size
Enter a fixed width of 604 pixels or less. Entering more than 604 pixels will cause the image to be automatically scaled by facebook with the implicit loss of quality due to facebook algorithms and the second resize and conver to jpeg operation. Entering less is ok, it will make your picture smaller and easier to upload. You can also enforce an arbitrary resize algorithm by choosing it (press "Advanced...") |
|
 |
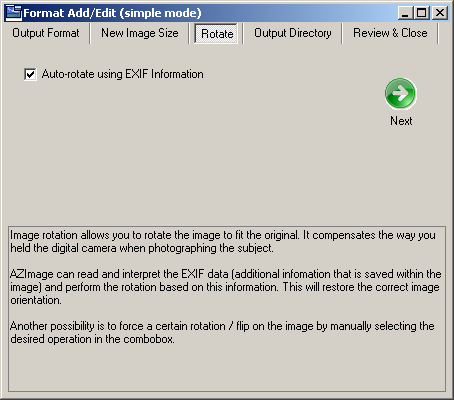
Rotate
The best option is "Auto-rotate using EXIF Information". This will let AZImage find out how the image was taken and to rotate it automatically to compensate for the camera position. Please note that in versions up to and including 2.4.4.1 we have a bug, that in rare cases of digital cameras that are not following the EXIF standard for the camera orientation field, AZImage generated a black image. To avoid that, please update your AZImage or alternatively choose "Do not rotate or flip" from the list. |
|
 |
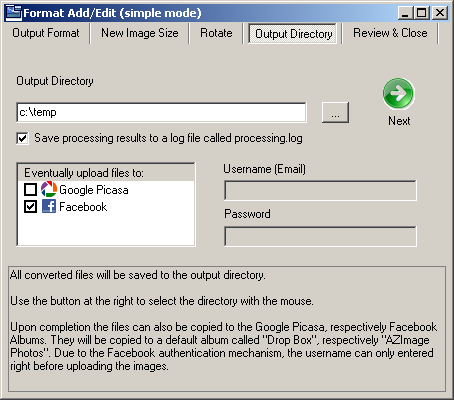
Output Directory
In this tab you have to enter a directory where AZImage will save the converted files before uploading them. Please note that existing files will be overwritten, so do choose a different location from where the original files are saved. C:\Temp for example. Also check "Facebook" from the list called "Eventually upload files to:". You cannot enter any username or password here. The authentification follows the WEB based facebook standard. That means that if you are already logged into facebook in an open Internet Explorer window the credentials will be used automatically. If not a WEB login form (secure) will be displayed. |
|
 |
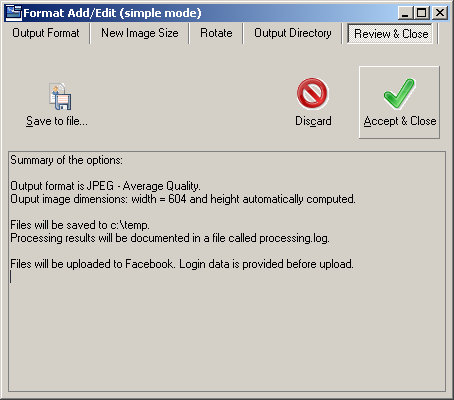
Review & Close
You can now close the dialogue by simply pressing "Accept \amp; Close". The new profile will be added at the end of the list. A description of all operations that AZImage performs for this profile is displayed in the text field below the buttons. Alternatively you can save the created profile to your computer, for example to share it later with your friends. |
|
 |
Convert and upload your photos. Click on the "Convert!" tab and then on "Start". A progress will be displayed and your conversion will be performed. At the end of the conversion the files will be uploaded to your facebook account into the "AZImage Photos" album. They will be waiting for your approval their, see the next step.
Approve your photos. Open your facebook account, goto your profile, click on Photos and then on the AZImage Photos album. The uploaded photos are displayed, each with a checkbox onto it. Check all images you want to share, choose from the list the people allowed to see them and click on approve. A good practice is to eventually move these photos to some other albums to keep them ordered.
It may sound complicated, but in fact it is really easy. You can watch a video demonstration on YouTube under the title "Upload your resized photos on facebook with AZImage".. In about 1 minute and a half we did everything as documented above! To try it yourself, just download AZImage!
We hope that this article answered your question. If not, please send us a feedbak on how to improve! Email us at support@racsoftware.com.
|